
Builders and homeowners have relied on gypsum plaster for years because it delivers tough walls with smooth finishes that improve interior design. Gypsum plaster shares the common characteristic of all building materials since it develops cracks over time because of multiple contributing factors. While cracks in walls and ceilings diminish their appearance, they also signal potential structural problems that require immediate attention.
This complete guide shows readers how to recognize and evaluate gypsum plaster surface cracks before learning how to fix them properly. The article guides readers through each repair stage by offering instructions step-by-step, along with tool suggestions and expert advice to fix both minor and major plaster cracks while restoring walls to their pristine condition.
Understanding Gypsum Plaster
Gypsum plaster is a versatile building material made from gypsum powder (calcium sulfate dihydrate) mixed with water to form a workable paste. Once applied to walls or ceilings, it sets and hardens through a chemical reaction, creating a smooth, fire-resistant surface that’s ideal for interior finishes.
Composition and Properties
Gypsum plaster typically consists of:
- Calcined gypsum (plaster of Paris)
- Water
- Various additives to control setting time and enhance workability
- Sometimes sand or other aggregates are used for texture and strength
The material offers several advantages, including:
- Excellent fire resistance
- Good sound insulation properties
- Natural moisture regulation capabilities
- Smooth finish potential
- Environmental friendliness due to its natural composition
Common Causes of Cracks in Gypsum Plaster
Understanding why plaster cracks helps homeowners address the root causes rather than just treating symptoms. Several factors can contribute to the development of cracks in gypsum plaster:
Structural Movement
Buildings naturally shift and settle over time, especially during their first few years. This movement can create stress on plaster surfaces, resulting in cracks. Common structural movements include:
- Foundation settlement
- Timber frame shrinkage
- Floor joist deflection
- Roof truss movement
Temperature and Humidity Fluctuations
Gypsum plaster expands and contracts with changes in temperature and humidity levels. Repeated cycles of expansion and contraction can lead to material fatigue and eventual cracking, particularly:
- Near heating elements, where rapid temperature changes occur
- In bathrooms and kitchens with fluctuating humidity
- Around windows and exterior walls exposed to seasonal changes
Poor Original Installation
Sometimes cracks appear due to issues with the original plaster application:
- Insufficient plaster thickness
- Improper mixing ratios
- Application over unsuitable surfaces
- Inadequate drying time between coats
- Poor bonding with the underlying substrate
Impact Damage
Direct physical impacts can cause plaster to crack:
- Furniture moving against the walls
- Door handles hitting walls
- Heavy objects are being mounted without proper support
- Children playing or having accidents in the home
Age-Related Deterioration
Over the decades, plaster naturally deteriorates as binding materials break down:
- Chemical changes in the gypsum composition
- Breakdown of fibrous reinforcement (in older plaster systems)
- Long-term effects of vibration from nearby roads or appliances
Types of Cracks in Gypsum Plaster
Not all plaster cracks are the same. Identifying the type of crack helps determine the appropriate repair method and whether there might be serious underlying issues to address.
Hairline Cracks
These are the thinnest cracks, typically less than 1mm wide. They often appear:
- In corners where walls meet ceilings
- Along the joints between plasterboard sheets
- In areas with minor seasonal movement
- As part of normal settling
Hairline cracks usually represent cosmetic rather than structural concerns and are relatively simple to repair.
Stress Cracks
Slightly wider than hairline cracks (1-2mm), stress cracks typically form:
- In diagonal patterns from the window and door corners
- Along the ceiling junctions
- Where different building materials meet
These cracks result from stress concentrations and typically require more thorough repair approaches.
Structural Cracks
These wider cracks (exceeding 2mm) often indicate more serious issues:
- Accompanied by bulging or sagging
- Following consistent patterns across multiple rooms
- Progressively widening over time
- Sometimes allowing water infiltration
Structural cracks warrant professional assessment before repair, as they may signify foundation problems or other significant structural issues.
Map Cracking
This pattern resembles a road map with interconnected cracks spreading across a surface. Map cracking typically indicates:
- Shrinkage during the initial drying process
- Improper plaster mixing
- Application over surfaces that were too absorbent
- Rapid drying conditions during installation
Assessing the Severity of Plaster Cracks
Before attempting repairs, it’s important to determine whether cracks are merely cosmetic or symptoms of more serious problems.
When to DIY vs. Call a Professional
DIY-appropriate cracks typically:
- Are less than 2mm wide
- Don’t change in width or length over time
- Aren’t accompanied by other issues like dampness or bulging
- They are limited to small areas
Professional assessment is recommended when cracks:
- Exceed 2mm in width
- Continue to expand over time
- Form step-like patterns
- Appear alongside other symptoms like dampness or bulging
- Recur after previous repairs
- Affect large sections of walls or ceilings
Simple Assessment Methods
Homeowners can conduct basic assessments by:
- Monitoring Progress: Mark the ends of cracks and date them to track changes over weeks or months
- Tape Test: Apply paper tape over cracks; if the tape tears, the crack is still active
- Moisture Check: Use a moisture meter near cracks to determine if water infiltration is involved
- Seasonal Observation: Note whether cracks appear or worsen during specific seasons
Tools and Materials Needed for Plaster Crack Repair
Having the right tools and materials on hand makes plaster repair work much more efficient.
Essential Tools
- Utility knife or crack widening tool
- Putty knives in various widths (1″, 3″, and 6″ recommended)
- Sandpaper (medium and fine grit)
- Sanding block or pole sander
- Dust mask and safety goggles
- Clean mixing containers
- Drill with mixing attachment (for larger repairs)
- Spray bottle with water
- Clean cloths or sponges
- Painter’s tape
Repair Materials
For minor repairs:
- Spackling compound or ready-mixed joint compound
- Self-adhesive fiberglass mesh tape
For more substantial repairs:
- Setting-type joint compound (also called hot mud)
- Plaster of Paris
- Primer-sealer
- Paint to match existing walls
Optional Specialized Products
- Plaster bonding agents
- Acrylic fortifiers for improved adhesion
- Elastomeric crack fillers for cracks subject to movement
- Textured spray for matching existing finishes
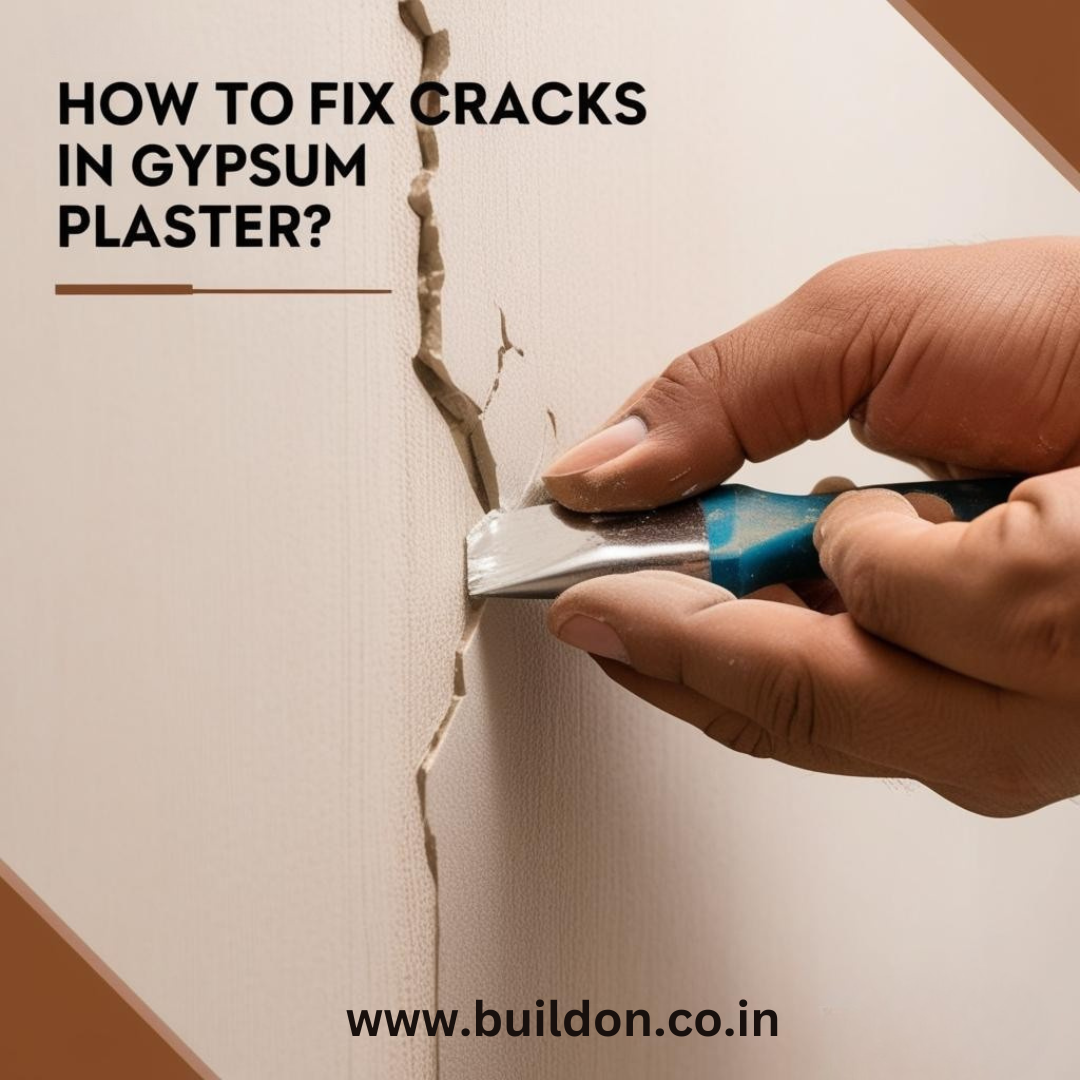
Step-by-Step Repair Process for Different Crack Types
The repair approach varies depending on the type and severity of cracks. Here are detailed procedures for the most common scenarios:
Repairing Hairline Cracks
- Prepare the area:
- Clean the surface with a damp cloth to remove dust and debris
- Allow the area to dry completely
- Widen the crack slightly:
- Use a utility knife to carefully scrape along the crack, creating a V-shaped groove
- This provides better adhesion for the repair compound
- Remove loose debris with a soft brush
- Apply primer-sealer:
- Brush a thin layer of primer-sealer into the crack
- This prevents excessive absorption of moisture from the repair compound
- Allow to dry according to the manufacturer’s instructions
- Fill the crack:
- Apply spackling or joint compound with a 1″ putty knife
- Press the compound firmly into the crack
- Feather the edges by drawing the knife at a shallow angle
- Allow to dry completely (typically 24 hours)
- Sand and finish:
- Lightly sand the repaired area with fine-grit sandpaper
- Wipe away dust with a damp cloth
- Apply a second thin coat if necessary
- Sand again when dry
- Prime and paint to match the surrounding area
Repairing Stress Cracks
- Prepare the crack:
- Widen the crack to about 1/8″ using a utility knife
- Clean out debris and dust
- Mist with water to reduce absorption
- Apply mesh tape:
- Cut self-adhesive fiberglass mesh tape to length
- Center and apply it over the crack
- Press firmly to ensure good adhesion
- Apply the first compound layer:
- Mix setting-type joint compound according to instructions
- Apply over the mesh tape with a 3″ putty knife
- Feather the edges about 2″ beyond the tape edges
- Allow to dry completely
- Final finishing:
- Sand the final coat with fine-grit sandpaper
- Feather edges to blend with the surrounding plaster
- Wipe clean with a damp cloth
- Prime and paint the entire wall section for a consistent appearance
Repairing Structural Cracks
Note: Before repairing structural cracks, ensure the underlying cause has been identified and addressed.
- Enlarge and clean the crack:
- Widen to approximately 1/4″ using a utility knife or small chisel
- Remove all loose material and dust
- Create a slightly wider space at the back of the crack for better “keying”
- Apply bonding agent:
- Brush a plaster bonding agent into the crack
- Allow to become tacky (follow manufacturer’s instructions)
- First fill with setting compound:
- Mix a batch of setting-type joint compound
- For deep cracks, consider adding acrylic fortifier
- Fill the crack slightly below the surface
- Allow to set completely
- Apply mesh reinforcement:
- Place fiberglass mesh tape over the initial fill
- Ensure it extends at least 3″ on either side of the crack
- Build up multiple layers:
- Apply successive layers of compound, each wider than the last
- The final layer should extend 8-12″ on either side
- Allow proper drying time between applications
- Keep the final coat slightly proud of the surface
- Final finishing:
- Sand carefully with medium then fine-grit sandpaper
- Blend edges with the surrounding plaster
- Clean dust thoroughly
- Prime with high-quality primer
- Paint with two coats for a consistent finish
Repairing Map Cracking
Map cracking often indicates more widespread issues with the original plaster application. In severe cases, replastering might be necessary, but many instances can be repaired:
- Surface preparation:
- Gently scrape any loose material
- Clean with a damp sponge
- Allow to dry thoroughly
- Apply primer-sealer:
- Cover the entire affected area with a quality primer-sealer
- This stabilizes the surface and improves adhesion
- Allow to dry completely
- Skim coat application:
- Mix a batch of setting-type compound
- Apply a thin skim coat over the entire affected area
- Use a wide trowel (8-12″) for smooth application
- Work in manageable sections
- Multiple coat approach:
- Apply 2-3 thin coats rather than one thick coat
- Each coat should be approximately 1/16″ thick
- Allow proper drying between coats
- Sand lightly between applications
- Final finishing:
- Sand the final coat with fine-grit sandpaper
- Prime the entire area
- Apply two coats of quality paint
Pro Tips for Seamless Repairs
Achieving professional-quality results requires attention to detail and some specialized techniques:
Mixing and Working with Compounds
- Mix only the amount of compound you can use within the setting time
- For setting-type compounds, clean tools immediately after use
- Add water sparingly when mixing to avoid a runny consistency
- For deeper cracks, use setting-type compounds rather than pre-mixed varieties
- Keep compounds at the right consistency, like smooth peanut butter
Creating Texture Matches
Matching existing textures can be challenging:
- For smooth finishes, dampen a sponge and lightly drag over nearly-dry compound
- For light texture, stipple with a brush or sponge while the compound is still workable
- For moderate texture, consider spray texture products in aerosol cans
- Test techniques on a scrap board before applying to the walls
Avoiding Future Cracks
Preventive measures can reduce the likelihood of new cracks forming:
- Allow proper drying time between coats (patience is crucial)
- Use flexible caulk rather than rigid compounds where different materials meet
- Consider using elastomeric compounds in areas prone to movement
- Maintain consistent indoor humidity levels (40-60% is ideal)
- Address water leaks and moisture issues promptly
Preventive Maintenance to Avoid Future Cracks
Preventing cracks is always easier than repairing them. Regular maintenance helps:
Regular Inspection Routines
Establish a schedule for checking plaster conditions:
- Look for early signs of cracking after seasonal changes
- Pay special attention to areas around windows and doors
- Check ceilings for discoloration or sagging
- Monitor previously repaired areas for any signs of failure
Climate Control Considerations
Maintaining stable environmental conditions helps preserve plaster:
- Use humidifiers or dehumidifiers to maintain consistent humidity levels
- Avoid rapid temperature changes when possible
- Ensure adequate ventilation, especially in moisture-prone rooms
- Consider installing climate monitoring systems in historic properties
Structural Maintenance
Address the building elements that support plaster:
- Repair roof leaks promptly
- Maintain gutters and downspouts to prevent water infiltration
- Address foundation issues when identified
- Ensure proper subfloor ventilation
When to Replace Rather Than Repair
Sometimes replacement is more practical than repair:
Signs That Plaster May Need Replacement
Consider replacement when:
- Plaster sounds hollow when tapped (indicating detachment)
- Large sections are bulging or sagging
- Water damage has caused extensive deterioration
- Previous repairs continue to fail
- The cost of repair approaches the replacement cost
Partial vs. Complete Replacement Options
When replacement is necessary:
- Consider spot replacement for localized damage
- Evaluate plasterboard overlay systems that preserve the original plaster
- For complete replacement, consider modern veneer plaster systems
- In historic properties, weigh authentic restoration against practical considerations
Why Choose Buildon?
When it comes to repairing cracks in gypsum plaster, especially for significant or recurring issues, professional expertise can make all the difference between a temporary fix and a lasting solution. BuildOn has established itself as one of India’s premier building restoration and repair services, with a particular specialization in traditional plastering techniques.
Comprehensive Assessment Approach
BuildOn stands apart through its methodical assessment protocol. Before recommending any repair solution, their technicians conduct:
- Detailed visual inspections using specialized lighting to reveal subtle crack patterns
- Moisture mapping to identify hidden water infiltration
- Structural movement analysis to determine if cracks indicate more serious issues
- Material compatibility testing to ensure repair compounds will bond properly with the existing plaster
This thorough approach prevents the common industry problem of “repair cycling”—where inadequately diagnosed cracks are repeatedly fixed only to reappear months later.
Customized Solutions for Every Property
Unlike companies offering one-size-fits-all repair methods, BuildOn develops tailored solutions for each project. Their repair strategies account for:
- The age and historical significance of the building
- The specific composition of the existing plaster
- Local climate and environmental factors
- The property’s usage patterns and requirements
- Budget constraints without compromising quality
This customized approach ensures optimal results whether working on a simple hairline crack in a modern apartment or an extensive restoration in a heritage structure.
Conclusion
Successful gypsum plaster crack repair demands knowledge of the crack type and causes, alongside choosing the correct repair methods. There are repairs that DIY enthusiasts can handle, but structural problems need professional work.
Homeowners who adhere to this complete guide will attain professional-grade repairs that create lasting, appealing results. A successful plaster repair requires not only filling cracks but also understanding and correcting underlying causes while selecting suitable materials and employing correct techniques.
When dealing with complex repairs or properties of historical importance, it’s essential to seek guidance from skilled experts such as Buildon to maintain both structural soundness and aesthetic appeal of plaster surfaces.
Gypsum plaster walls and ceilings will remain attractive and resilient over time if they receive proper maintenance and prompt repairs.