Tag Archives: buildon

What Is Decorative Plaster?

What Is Decorative Plaster? How It Works

Gypsum plaster is not only used for finishing of internal walls, it is also used for ceilings, pillars, walls, corners, lobby areas & more.

Have you ever walked into a beautifully designed home or office and wondered what gave those walls their stunning, flawless finish? The answer often lies in the skilled application of decorative plaster—a time-tested construction technique that has been transforming Indian spaces for centuries. From ancient palaces to modern residential complexes, decorative plaster continues to play a crucial role in creating aesthetically pleasing and durable wall surfaces.

In today’s competitive construction market, architects, builders, and homeowners are increasingly seeking high-quality plastering solutions that not only enhance visual appeal but also provide long-lasting protection. This comprehensive guide explores everything you need to know about decorative gypsum plaster, how it works, and why it’s becoming the preferred choice for construction projects across India.

Understanding Decorative Plaster: The Foundation of Beautiful Walls

Decorative plaster is a specialized building material used for both protective and aesthetic coating of walls and ceilings. Unlike basic plastering, decorative plaster combines functionality with visual appeal, creating smooth, even surfaces that serve as the perfect canvas for paint, wallpaper, or other decorative treatments.

The primary purpose of decorative plaster extends beyond mere aesthetics. It provides essential protection against moisture, weather elements, and daily wear and tear while creating a uniform surface that conceals imperfections in underlying masonry work. This dual functionality makes it an indispensable component in modern construction projects.

In the Indian construction industry, decorative plaster has evolved significantly from traditional lime and clay-based mixtures to advanced gypsum-based plasters. These modern formulations offer superior durability, faster application times, and enhanced finish quality compared to conventional alternatives.

The Science Behind How Decorative Plaster Works

The effectiveness of decorative plaster lies in its unique chemical composition and application process. When mixed with water, gypsum plaster undergoes a controlled chemical reaction called hydration, which transforms the powder into a workable paste that gradually hardens into a solid, durable surface.

Modern decorative plaster systems typically contain:

  • High-grade gypsum hemihydrate as the primary binding agent
  • Specialized additives for improved workability and durability
  • Lightweight aggregates for enhanced thermal properties
  • Setting time regulators for optimal application conditions

The working mechanism involves several critical stages. Initially, the plaster mixture remains plastic and workable, allowing skilled craftsmen to apply it smoothly across wall surfaces. As the hydration process continues, the plaster begins to set, during which time it can be shaped, textured, or smoothed to achieve the desired finish. Finally, the plaster cures completely, forming a hard, protective layer that bonds permanently with the substrate.

Types of Decorative Plaster Solutions

The Indian construction market offers various types of decorative plaster, each designed for specific applications and performance requirements:

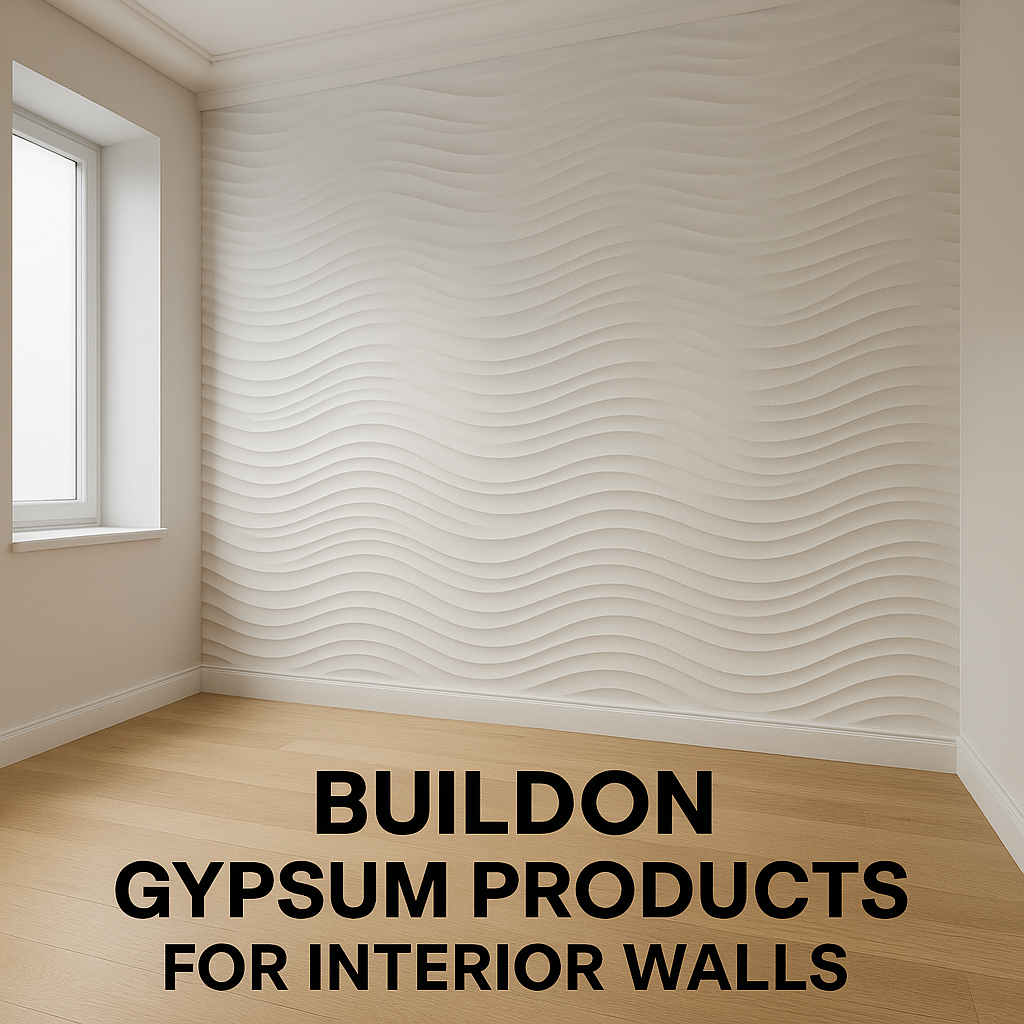
Gypsum-Based Decorative Plaster

This represents the most popular category, offering excellent workability, quick setting times, and superior finish quality & gives better coverage. High-quality gypsum plaster provides a pure white color and exceptional hardness, making it ideal for interior applications where smooth, paintable surfaces are required. It is also used in making cornices, side panels between joints of wall & ceilings, statues, Idols & many more things.

Lightweight Aggregate Plaster

Incorporating materials like perlite or vermiculite, these specialized formulations offer enhanced thermal insulation properties while maintaining excellent decorative qualities. They’re particularly effective in climate-controlled environments where energy efficiency is a priority.

Sand Cement Ready-Mix Plaster

These pre-formulated ready mix plaster solutions eliminate the guesswork from mixing ratios, ensuring consistent quality and reducing labor costs. They’re particularly beneficial for large-scale construction projects where uniformity and efficiency are paramount.

Specialized Decorative Finishes

Advanced gypsum plaster systems can incorporate various textures, patterns, and even decorative elements to create unique visual effects. These solutions are popular in high-end residential and commercial projects where distinctive aesthetics are desired.

Benefits of Using Quality Decorative Plaster

The advantages of choosing superior decorative plaster extend far beyond initial cost considerations:

  • Enhanced Durability: Quality plaster systems provide long-lasting protection against cracks, moisture damage, and structural deterioration. Projects using premium materials often maintain their appearance and integrity for decades with minimal maintenance.
  • Superior Finish Quality: Modern decorative plaster creates exceptionally smooth, uniform surfaces that enhance the appearance of any decorative treatment applied subsequently. This is particularly important for high-end residential and commercial projects where visual standards are paramount.
  • Improved Energy Efficiency: Many contemporary plaster formulations incorporate thermal insulation properties, contributing to improved energy performance in buildings. This becomes increasingly important as energy costs rise and environmental considerations gain prominence.
  • Faster Construction Timelines: Advanced plaster systems often feature better setting characteristics, allowing construction projects to proceed more efficiently. This speed advantage can significantly impact project schedules and overall costs.
  • Reduced Maintenance Requirements: Quality decorative plaster systems resist common problems like flaking, chalking, and moisture damage, reducing long-term maintenance expenses and preserving property values.

Application Process and Best Practices

The successful application of decorative plaster requires careful attention to preparation, mixing, and application techniques:

Surface Preparation

Proper substrate preparation forms the foundation of any successful plastering project. This involves cleaning surfaces thoroughly, ensuring appropriate moisture levels, and applying primer where necessary. The substrate must be sound, clean, and free from dust, grease, or other contaminants that could affect adhesion.

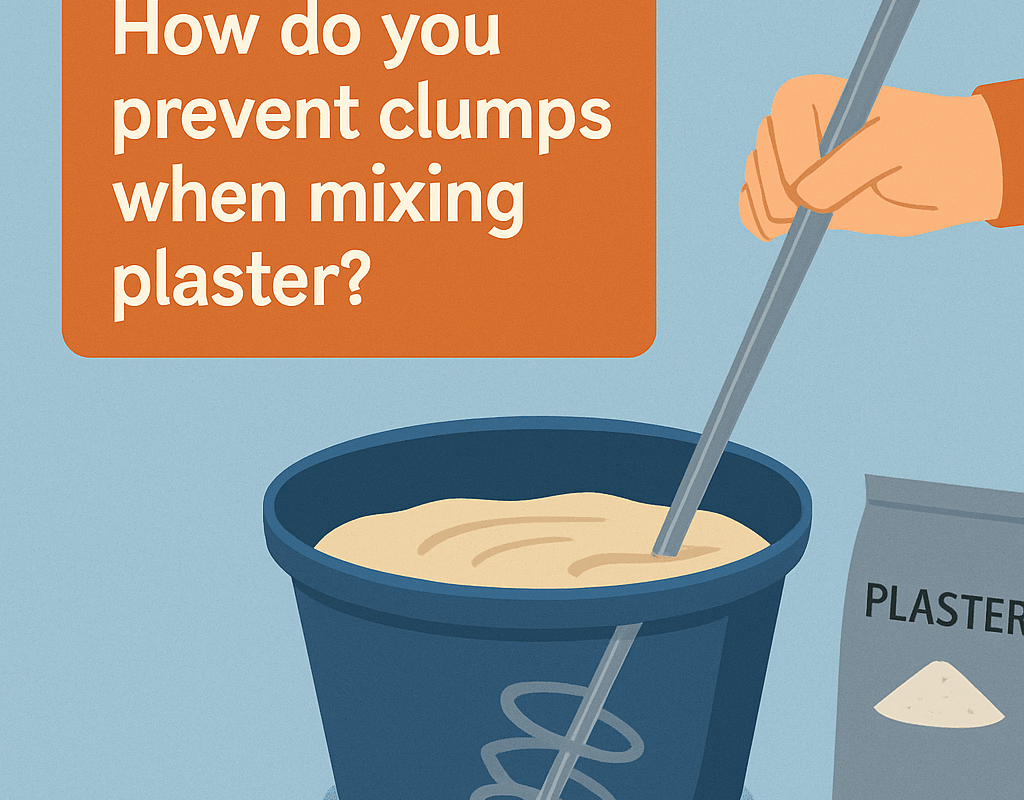
Mixing and Application

Professional application requires precise mixing ratios and proper timing. The plaster should be mixed to achieve optimal consistency—not too thick to hinder application, nor too thin to compromise strength. Skilled applicators use specialized tools to ensure uniform thickness and smooth finishing.

Quality Control

Throughout the application process, regular quality checks ensure consistent results. This includes monitoring setting times, checking for proper adhesion, and ensuring uniform thickness across all surfaces.

Common Applications in Indian Construction

Decorative plaster finds extensive use across various construction segments:

  • Residential Projects: From luxury apartments to individual homes, decorative plaster creates beautiful interior spaces that serve as perfect backdrops for modern living. It’s particularly popular in bedrooms, living areas, and formal spaces where aesthetic appeal is paramount.
  • Commercial Buildings: Offices, hotels, retail spaces, and restaurants rely on decorative plaster to create professional, welcoming environments. The durability and low maintenance requirements make it especially suitable for high-traffic areas.
  • Institutional Buildings: Schools, hospitals, and government facilities benefit from the hygiene, durability, and aesthetic qualities of quality plaster systems. These applications often require specialized formulations that meet specific performance standards.
  • Heritage Restoration: Many historic buildings in India undergo restoration using modern decorative plaster techniques that respect traditional aesthetics while providing contemporary performance standards.

Choosing the Right Decorative Plaster for Your Project

Selecting appropriate decorative plaster depends on several critical factors:

Consider the environmental conditions where the plaster will be applied. Interior applications may prioritize smooth finishing and paintability, while areas with higher humidity might require moisture-resistant formulations. Climate considerations also influence product selection, as extreme temperatures can affect setting times and final performance.

Project requirements play a crucial role in product selection. Large-scale commercial projects might benefit from ready-mix plaster that ensure consistency and reduce labor costs for outer walls, while smaller residential projects also allow for some customized approaches. Even Gypsum plaster is economical for internal wall plastering.

Budget considerations must balance initial costs against long-term performance. While premium products might require higher upfront investment, their superior durability and reduced maintenance requirements often provide better value over time.

Quality Standards and Specifications

The Indian construction industry increasingly emphasizes quality standards for decorative plaster systems. Leading manufacturers invest heavily in research and development to create products that exceed market expectations for purity, strength, and performance. IS 2547-1 Part 1 & Part 2, IS 2542-1 Part 1 & Part 2.

Quality decorative plaster should meet or exceed established industry standards for:

  • Purity & Whiteness
  • Compressive strength and durability
  • Setting time consistency
  • Workability and application properties
  • Color consistency and finish quality
  • Adhesion characteristics
  • Coverage

When evaluating products, look for manufacturers who provide detailed technical specifications, quality certifications, and comprehensive technical support. This ensures that your project benefits from proven performance and professional expertise.

Future Trends in Decorative Plaster Technology

The decorative plaster industry continues to evolve, with exciting developments on the horizon:

  1. Sustainable Formulations: Environmental consciousness drives innovation towards eco-friendly plaster systems with reduced carbon footprints and improved recyclability.
  2. Smart Plaster Systems: Emerging technologies incorporate sensors and responsive materials that can adapt to environmental conditions or provide additional functionality.
  3. Enhanced Performance: Ongoing research focuses on developing plasters with superior strength, faster application times, and improved aesthetic qualities.
  4. Digital Integration: Advanced manufacturing techniques and quality control systems ensure more consistent products and better performance predictability.

Conclusion

Decorative plaster represents far more than a simple construction material—it’s the foundation upon which beautiful, durable spaces are built. From its ancient origins to modern innovations, plaster continues to evolve, offering improved performance, enhanced aesthetics, and greater value for construction projects across India.

The key to successful decorative plaster application lies in choosing quality materials from reputable manufacturers like Buildon Plasters, ensuring proper application techniques, and maintaining appropriate quality standards throughout the construction process. With the right approach, decorative plaster can transform ordinary spaces into extraordinary environments that stand the test of time.

Whether you’re planning a residential renovation, commercial development, or institutional project, understanding decorative plaster and its applications empowers you to make informed decisions that enhance both immediate visual appeal and long-term value. As the construction industry continues to evolve, decorative plaster remains an essential component in creating spaces that are not only beautiful but also durable, functional, and cost-effective.

For construction professionals and property owners seeking premium plastering solutions, partnering with established manufacturers who understand the Indian market’s unique requirements ensures project success. Quality decorative plaster, properly applied and maintained, represents an investment in lasting beauty and structural integrity that pays dividends for years to come.

Frequently Asked Questions

1. What is the difference between decorative plaster and regular plaster?

Regular plaster is used for smooth wall finishes before painting, while decorative plaster adds texture, patterns, or artistic effects for visual appeal.

2. Can decorative plaster be applied over existing painted surfaces?

Generally, decorative plaster should be applied over properly prepared substrates. Painted surfaces may require special preparation, including cleaning, priming, or partial removal for optimal adhesion.

3. What factors affect the cost of decorative plaster application?

Costs depend on surface area, substrate conditions, chosen product quality, labor requirements, and project complexity. Premium products typically offer better long-term value despite higher initial costs.

4. How do I maintain decorative plaster surfaces after application?

Quality decorative plaster requires minimal maintenance. Regular cleaning with appropriate methods, prompt repair of minor damage, and periodic inspection help maintain appearance and performance over time.

What Type of Plastering Is Used for Interior Walls?

What Type of Plastering Is Used for Interior Walls?

When building or renovating your home, choosing the right type of plastering for your interior walls is crucial for both aesthetics and functionality. From the traditional lime plaster used in heritage buildings to modern gypsum solutions, the plastering landscape in India has evolved significantly. Whether you’re constructing a new home in Mumbai or renovating an apartment in Bangalore, understanding the various plastering options available can help you make an informed decision that ensures durability, cost-effectiveness, and visual appeal.

Interior wall plastering isn’t just about creating a smooth surface it’s about selecting the right material that complements your climate, construction method, and long-term maintenance preferences. Let’s explore the different types of plastering for interior walls and help you choose the best option for your project.

Traditional Cement Sand Plaster

Cement sand plaster remains one of the most popular plastering methods in Indian construction. This traditional approach involves mixing cement, sand, and water in specific proportions to create a strong, durable surface.

Advantages of Cement Sand Plaster:

  • Exceptional strength and durability
  • Suitable for all weather conditions
  • Can be used for both interior and exterior applications

Disadvantages:

  • Needs extra water curing, which consumes more resources and increases overall cost
  • Prone to cracking if not properly mixed
  • Heavier weight adds to the structural load

The typical mixing ratio for interior walls is 1:4 or 1:6 (cement:sand), depending on the specific requirements and local practices. In regions like Tamil Nadu and Kerala, where humidity levels are high, cement sand plaster provides excellent moisture resistance for external walls.

Gypsum Plaster: The Modern Solution

Gypsum plaster has revolutionised interior wall finishing in Indian construction. This modern alternative offers numerous advantages over traditional cement-based solutions and has become increasingly popular in urban construction projects.

Key Benefits of Gypsum Plaster:

  • Better setting time (Initial 12-15 mins & final 24-30 mins)
  • Smooth, ready-to-paint finish
  • Excellent adhesion to various surfaces
  • Thermal insulation properties
  • Crack-resistant formulation
  • No curing required

Buildon Gypsum Products for Interior Walls:

Companies like Buildon Plasters have pioneered high-quality gypsum solutions in India. Their product range includes:

  1. Buildon Gypsum Plaster One-Coat: Made from the highest grade gypsum sourced from purest mines, this premium product offers exceptional hardness – 40% more than other gypsum brands in the Indian market. The pure white colour ensures excellent finish quality.
  2. Buildon Imported Gypsum Plaster: Specially formulated using high-purity imported gypsum, this product delivers a smooth, uniform finish with excellent workability. It is lightweight, easy to apply, and requires minimal water curing—saving both time and resources.
  3. Buildon Gypsum Master Plaster: Produced from light powder-density rock, this product provides superior workability and finish for interior applications.
  4. Buildon Classic Gypsum Plaster: A cost-effective solution that maintains quality standards while being budget-friendly for residential projects.
  5. Buildon Perliter Gypsum Plaster: Specially formulated gypsum with special additives and lightweight aggregates.

Specialised Plaster Solutions

Perlite Plaster

Buildon Perlite Plaster combines gypsum with special additives and lightweight aggregates. This innovative solution offers:

  • Enhanced thermal insulation
  • Reduced weight load on structures
  • Improved fire resistance
  • Better sound insulation properties
  • Extra coverage

Vermiculite Plaster

Buildon Vermiculite Plaster incorporates vermiculite aggregates with gypsum hemihydrates, providing:

  • Excellent thermal properties
  • Lightweight application
  • Superior fire resistance
  • Enhanced acoustic insulation

Ready-Mix Solutions

For contractors prioritizing efficiency and performance, Buildon P-20 Cementitious Dry Ready Mix Plaster delivers a pre-blended, high-quality solution ideal for both interior and exterior plastering. Its precisely graded river sand, cement, and premium additives ensure uniform quality, eliminate on-site mixing errors, and reduce application time resulting in a durable, water-tight finish across all types of masonry surfaces.

Choosing the Right Type of Plastering for Your Interior Walls

Consider Your Climate

In humid coastal regions like Mumbai, Chennai, and Kochi, gypsum plaster is ideal due to its moisture-resistant properties. In areas with extreme temperature variations, its excellent thermal insulation capabilities help maintain interior comfort and energy efficiency.

Evaluate Your Timeline

If you’re working on a tight construction schedule, gypsum plaster’s quick setting time can significantly reduce project duration. Traditional cement sand plaster requires longer curing periods & water curing, which might not suit fast-track projects.

Budget Considerations

While gypsum plaster may have slightly higher material costs, it often proves to be more cost-effective in the long run. Its quick application, minimal labour requirements, and elimination of water curing lead to faster project completion and reduced overall expenses. When evaluating costs, it’s essential to consider not just materials but also time, labour, and project efficiency.

Surface Preparation Requirements

Different types of plastering require varying levels of surface preparation. Gypsum plaster requires bonding agent on RCC walls, RCC structures & on joints between Siporex blocks & RCC structures, ensuring proper adhesion and longevity.

Application Best Practices

For Gypsum Plaster Application:

  1. Ensure surface is clean and dust-free
  2. Apply bonding agent if required
  3. Mix plaster as per manufacturer’s instructions
  4. Level and smooth surface before setting

For Cement Sand Plaster:

  1. Prepare surface by cleaning and Hydrating
  2. Apply in two coats – rough coat and finishing coat
  3. Maintain proper curing for 7-28 days
  4. Ensure adequate protection from direct sunlight and wind

Maintenance and Longevity

The lifespan of interior plastering depends significantly on the chosen material and application quality. Gypsum plaster, when properly applied, can last 15-20 years without major maintenance. Quality products from established manufacturers like Buildon ensure consistent performance and durability.

Regular inspection for cracks, moisture penetration, or surface deterioration helps maintain the plaster’s integrity. Most gypsum plasters are ready for painting immediately after application, reducing overall project time.

Conclusion

Selecting the right type of plastering for interior walls depends on various factors including climate, timeline, budget, and specific project requirements. While traditional cement sand plaster remains viable for many applications, modern gypsum solutions offer superior convenience, finish quality, and time savings.

For Indian construction projects, companies like Buildon Plasters provide comprehensive solutions ranging from basic gypsum plaster to specialised thermal insulation options. Their products’ proven track record in projects across Mumbai, Bangalore, Chennai, and other major cities demonstrates the reliability of modern plastering solutions.

Whether you choose traditional cement sand plaster or modern gypsum alternatives, proper material selection and skilled application ensure long-lasting, aesthetically pleasing interior walls that enhance your living space.

Ready to transform your interior walls with premium plastering solutions? Contact Buildon Plasters to explore their comprehensive range of products and find the perfect plastering solution for your project.

Frequently Asked Questions

Q1: What is the best type of plastering for interior walls in humid climates? 

While gypsum plaster offers a smooth finish and faster application, it is not moisture-resistant and is not recommended for wet areas like bathroom walls. For humid climates, we can use buildon gypsum plaster but it’s best if used in dry interior spaces, while cement-based plasters are more suitable for moisture-prone areas.

Q2: How long does gypsum plaster take to dry compared to cement plaster? 

Gypsum plaster typically sets within 20–30 minutes, and the surface can be ready for painting after about a day or two, depending on site conditions and ventilation. In contrast, cement sand plaster requires 7–28 days of curing before painting can begin.

Q3: Can I apply gypsum plaster directly on concrete surfaces? 

It’s recommended to use a bonding agent like Plaster Bond+, BONDIT-151 when applying gypsum plaster on concrete blocks or RCC surfaces for proper adhesion.

Q4: Which plastering type is more cost-effective for large residential projects? 

While gypsum plaster has higher material costs, it’s often more cost-effective overall due to reduced labour time, no curing requirements, and immediate painting capability.

Q5: What is the coverage area of gypsum plaster per bag? 

Coverage varies based on the product type and wall conditions. For Buildon’s standard gypsum plaster:

  • A 25 kg bag covers approximately 20 sq. ft. at 12mm thickness
  • A 20 kg bag covers approximately 16 sq. ft. at 12mm thickness
    For Buildon’s Perlite-based gypsum plaster, coverage is higher—around 24 sq. ft. at 12mm thickness. Actual coverage may vary slightly depending on surface smoothness and application method.
Create a feature image for How do you prevent clumps when mixing plaster?

How do you prevent clumps when mixing plaster?

Nothing frustrates Masons, interior designers, contractors, and builders more than discovering lumps and clumps in their plaster mix just when they’re ready to apply it. These unwanted formations can ruin an entire project, leading to uneven surfaces, poor adhesion, and ultimately, costly rework. Whether you’re working with gypsum plaster for residential projects or commercial spaces, choosing the right wall plastering material and mixing it correctly is crucial to achieve a smooth, lump-free finish that meets professional standards.

The key to preventing clumps lies in understanding the science behind plaster mixing and applying proven techniques that ensure consistent quality every time. Whether you’re working with traditional plaster or ready mix plaster, this comprehensive guide will walk you through professional methods, common mistakes to avoid, and expert tips that will transform your plastering outcomes.

Understanding Why Clumps Form in Plaster Mixtures

The Science Behind Plaster Clumping

Gypsum plaster is a calcium-based chemical substance that’s heated to over 300 degrees and acts as a binding agent when combined with water. When mixing isn’t done correctly, the fine powder particles don’t hydrate uniformly, creating dry pockets that form stubborn clumps.

Several factors contribute to clump formation:

  • Incorrect Mixing Sequence: Adding water to plaster instead of plaster to water creates immediate clumping as the powder forms a hard shell around dry centers.
  • Improper Water Temperature: Using water that’s too hot or too cold affects the hydration process and can cause uneven mixing.
  • Insufficient Mixing Time: Rushing the process doesn’t allow all particles to properly hydrate and integrate.
  • Wrong Water-to-Plaster Ratio: Incorrect proportions create either too-thick mixtures that won’t blend properly or too-thin mixtures that separate.
  • Poor Water Quality: Using impure or contaminated water introduces unwanted minerals and particles that disrupt the plaster’s setting reaction, increasing the chances of clumping.

The Golden Rule: Always Add Plaster to Water

Why This Sequence Matters

Professional plasterers universally agree: always add plaster to water, never the reverse. This fundamental rule prevents immediate clump formation and ensures better overall consistency.

When you add plaster to water:

  • Individual particles become surrounded by water molecules
  • Hydration occurs gradually and evenly
  • The mixture maintains better workability
  • Clumps are naturally prevented from forming

Step-by-Step Mixing Process

Step 1: Prepare Your Materials Start with clean, room-temperature water in a clean mixing container. Use only potable water for best results.

Step 2: Measure Accurately For gypsum plaster, the typical ratio is one part plaster to two parts water by volume. However, always check manufacturer specifications as ratios can vary.

Step 3: Add Plaster Gradually Pour gypsum plaster slowly into the water while stirring continuously. Add small amounts at a time, allowing each addition to integrate before adding more.

Step 4: Use Proper Mixing Technique Use back-and-forth strokes while occasionally turning the bowl and scraping down the sides to incorporate all material evenly.

Professional Mixing Techniques and Tools

Manual Mixing Methods

For small batches, hand mixing remains effective when done correctly:

  • Circular Motion Technique: Work the plaster in consistent circular motions, ensuring you reach all areas of the container.
  • Figure-8 Pattern: This pattern helps eliminate dead spots where unmixed plaster might hide.
  • Scraping Technique: Regularly scrape the sides and bottom of the container to incorporate all material.

Mechanical Mixing Solutions

Modern professional methods use paddle mixers or paint mixers attached to electric drills for consistent results.

Paddle Mixer Benefits:

  • Ensures uniform mixing throughout the entire batch
  • Reduces mixing time significantly
  • Minimizes air bubble incorporation
  • Provides consistent results across multiple batches

Optimal Mixing Speed: Research shows that mixing rates between 240-360 rpm provide optimal results, balancing thorough mixing with minimal air incorporation.

Water Temperature and Quality Considerations

Water Temperature and Quality Considerations

Temperature Impact on Mixing

Water temperature significantly affects both mixing success and setting time:

  • Room Temperature Water (20-25°C): Provides optimal hydration rates and working time.
  • Cold Water: Slows the setting process but can make initial mixing more difficult.
  • Hot Water: Hot water speeds up setting time too quickly and can weaken the plaster.

Water Quality Requirements

Always use clean, potable water free from:

  • Excessive minerals that can affect setting
  • Organic matter that might cause discoloration
  • Chemical contaminants that could weaken the bond

Explore the different types of gypsum plaster and their uses to find the ideal solution for interior walls, ceilings, and specialized construction needs.

Timing and Resting Techniques

The Slaking Process

Allow the plaster to soak undisturbed for 2-4 minutes depending on batch size after initial mixing. This slaking period allows:

  • Complete hydration of all particles
  • Elimination of trapped air bubbles
  • Uniform consistency throughout the mixture
  • Better workability during application

Final Mixing Phase

After slaking, perform a final gentle mixing to ensure uniformity without introducing excess air. Mix thoroughly for 1-2 minutes to ensure smooth consistency.

Common Mistakes That Cause Clumping

  • Mixing Sequence Errors

The most common mistake is adding water to plaster instead of plaster to water. This creates instant clumping that’s difficult to eliminate.

  • Inadequate Preparation

Failing to properly clean mixing equipment or using contaminated water can introduce particles that act as clumping nuclei.

  • Rushing the Process

Proper mixing requires patience – rushing leads to inadequate hydration and clump formation.

  • Incorrect Ratios

Using too little water creates thick mixtures that won’t blend properly, while too much water causes separation and settling. Improper gypsum plaster to water ratio can result in slow setting or fast setting of the mixture.

Advanced Techniques for Large-Scale Projects

Batch Consistency Methods

For large projects requiring multiple batches:

  • Standardized Measuring: Use the same measuring containers for each batch to ensure consistency.
  • Temperature Control: Maintain consistent water temperature across all batches.
  • Timing Protocols: Follow the same mixing and slaking times for every batch.

Quality Control Measures

  • Visual Inspection: Each batch should have uniform color and texture without visible lumps.
  • Consistency Testing: Use a consistent testing method to verify proper mixing before application.
  • Documentation: Keep records of mixing ratios and times for future reference.

Gypsum Plaster Specific Considerations

Understanding Gypsum Properties

Gypsum plaster has unique characteristics that affect mixing:

  • Quick Setting: Gypsum sets faster than other plasters, requiring efficient mixing techniques.
  • Fine Particle Size: The flour-like consistency requires gentle but thorough mixing to prevent clumping.
  • Workability Window: Limited working time means proper mixing is crucial for application success.

Professional Gypsum Plastering Services

For complex projects or when consistent results are critical, professional gypsum plastering services offer expertise in:

  • Proper mixing techniques for different applications
  • Equipment selection and maintenance
  • Quality control throughout the process
  • Troubleshooting mixing problems

When to Start Over

If clumps persist after proper mixing attempts, it’s often more cost-effective to start fresh rather than risk poor application results.

Environmental Factors Affecting Mixing

Temperature and Humidity

Gypsum plaster should only be applied when minimum temperatures remain at 2°C or above until dry. These conditions also affect mixing success.

  1. High Humidity: Can slow drying but may help with mixing consistency.
  2. Low Humidity: Accelerates setting time, requiring faster mixing and application.
  3. Temperature Fluctuations: Can cause uneven setting and mixing difficulties.

Storage Considerations

Proper storage of plaster materials prevents clumping issues:

  1. Dry Storage: Store plaster in a dry place, away from damp or silane-treated walls to avoid premature setting.
  2. Temperature Stability: Store in temperature-controlled environments when possible.
  3. Container Integrity: Ensure storage containers are properly sealed to prevent moisture infiltration.

Quality Assurance and Testing

Pre-Application Testing

Before applying plaster to your project:

  • Small Batch Testing: Mix a small amount to verify technique and ratios.
  • Consistency Evaluation: Ensure the mixture meets your quality standards.
  • Setting Time Verification: Confirm the mixture provides adequate working time.

Long-Term Quality Control

  • Equipment Maintenance: Keep gypsum plaster mixing tools clean and well-maintained.
  • Material Quality: Use only fresh, high-quality gypsum plaster materials.
  • Technique Refinement: Continuously improve mixing techniques based on results.

Professional Tips for Consistent Results

Equipment Selection

  1. Mixing Containers: Use containers with smooth surfaces that won’t trap unmixed material.
  2. Mixing Tools: While automatic paddle mixers are common globally, in India, plaster mixing is typically done by hand due to smaller batch sizes and practical constraints.
  3. Measurement Tools: Accurate measuring ensures consistent ratios across all batches.

Workflow Optimization

  1. Preparation Phase: Set up all materials and tools before beginning mixing.
  2. Timing Coordination: Plan mixing timing to align with application schedules.
  3. Team Communication: Ensure all team members understand proper mixing procedures.

Conclusion

Preventing clumps in plaster mixing isn’t just about following a recipe—it’s about understanding the science behind the process and applying proven professional techniques consistently. The key principles remain constant: always add plaster to water, use proper mixing techniques, maintain correct ratios, and allow adequate time for proper hydration. Whether you’re a seasoned contractor or a DIY enthusiast, mastering these steps is essential for working with the best wall plaster and achieving a smooth, flawless finish every time.

Whether you’re an interior designer specifying plaster finishes, a contractor managing large projects, or a builder ensuring quality results, mastering these mixing techniques will significantly improve your outcomes. Remember that investing time in proper mixing techniques saves money on materials, labor, and rework while ensuring professional-quality results.

For complex projects requiring consistent, professional results, consider partnering with experienced gypsum plastering services of Buildon Plasters private limited that understand these principles and can deliver the quality your projects demand. Visit buildon to explore professional plastering solutions and services that can help ensure your next project achieves the smooth, professional finish your clients expect.

The difference between amateur and professional results often comes down to attention to detail in the mixing process. By following these guidelines and continuously refining your technique, you’ll achieve the consistent, lump-free gypsum plaster mixtures that form the foundation of exceptional plastering work.

Frequently Asked Questions

Q: What’s the most important rule for preventing clumps when mixing plaster? 

Always add plaster to water, never water to plaster. This prevents immediate clumping and ensures better overall consistency throughout the mixing process.

Q: How long should I mix gypsum plaster to prevent clumps?

Mix for 1-2 minutes initially, then allow 2-4 minutes for slaking, followed by a final gentle mixing phase to ensure uniform consistency.

Q: Can I use hot water to speed up the mixing process?

No, hot water accelerates setting time too quickly and can weaken the plaster. Use room temperature water for optimal results.

Q: What’s the correct water-to-plaster ratio for gypsum plaster?

The recommended ratio is typically 1:1.3 (plaster to water by volume). However, some masons may adjust this based on their experience and comfort. Always refer to the product’s manufacturer guidelines for best results.

Q: When should I consider professional gypsum plastering services?

For large projects, complex applications, or when consistent professional results are critical to project success and client satisfaction.

Is the Plaster of Paris and Gypsum Plaster the Same?

Is the Plaster of Paris and Gypsum Plaster the Same?

When walking through construction sites or planning interior wall plastering projects, you’ve likely encountered both terms: gypsum plaster and Plaster of Paris. But are they the same material? This question confuses many builders, contractors, and interior designers, leading to incorrect material selection and potentially compromised project outcomes.

The short answer is no – while both materials originate from the same mineral source, they have distinct compositions, properties, and applications that make each suitable for specific construction and design purposes. Understanding these differences can save you time, money, and ensure superior results in your next project.

Understanding the Basic Chemistry: What Sets Them Apart

Gypsum Plaster Composition and Formation

Gypsum plaster is manufactured from calcium sulfate dihydrate (CaSO₄·2H₂O), which is the natural mineral form of gypsum. This wall plastering material retains its crystalline water structure, giving it unique properties that make it ideal for modern construction applications.

The manufacturing process involves carefully controlled heating and processing to maintain the material’s structural integrity while creating a workable plaster compound. Premium manufacturers like Buildon source their gypsum from the purest mines, ensuring 40% harder consistency and pure white color compared to standard market alternatives.

Plaster of Paris: The Dehydrated Alternative

Plaster of Paris is prepared by heating calcium sulfate dihydrate (gypsum) to 120–180 °C (248–356 °F). This heating process removes most of the water molecules, transforming the compound into calcium sulfate hemihydrate (CaSO₄·0.5H₂O).

Gypsum (chemical formula: CaSO₄·2H₂O) contains two molecules of water of crystallization. This means for every calcium sulfate unit, there are two water molecules bound within its crystalline structure.

When gypsum is heated to around 150°C, it loses 1.5 molecules of water, becoming Plaster of Paris (CaSO₄·½H₂O) — which contains only half a molecule of crystallization water per calcium sulfate unit. This fundamental difference in water content creates distinct working characteristics and applications for each material.

Key Differences That Impact Your Project Choice

Setting Time and Workability

The water content difference creates contrasting working periods:

  • Plaster of Paris: Sets quickly, usually within 30 minutes, making it suitable for small-scale applications where rapid completion is needed. This quick setting time can be both an advantage and limitation depending on your project scope.
  • Gypsum Plaster: Offers extended working time, allowing contractors to cover larger areas efficiently. This extended workability makes it the preferred choice for interior wall plastering in residential and commercial projects.

Strength and Durability Characteristics

  • Structural Performance: Gypsum offers higher strength and is more durable, making it suitable for structural applications. This enhanced strength translates to longer-lasting wall finishes with reduced maintenance requirements.
  • Load-Bearing Capacity: Gypsum plasters have higher compressive strength and lower density, which reduces wall weight while maintaining structural integrity. This property is particularly valuable in multi-storey construction where weight reduction is crucial.

Application Thickness and Coverage

  • Plaster of Paris Applications: The application increases wall thickness and may cause cracks after application on sand cement plastered walls. This limitation makes it less suitable for large-scale wall applications.
  • Gypsum Plaster Coverage: Modern ready mix plaster formulations, such as those offered by Buildon, provide consistent coverage with precise thickness control. A single 25kg bag typically covers specific square footage with optimal 12mm thickness, ensuring uniform application across entire wall surfaces.

Professional Applications: When to Choose Each Material

Interior Wall Plastering with Gypsum Plaster

For comprehensive interior wall plastering projects, gypsum plaster stands as the professional choice. Its superior bonding properties allow direct application on various surfaces, eliminating the need for sand cement base coats in many situations.

Leading manufacturers like Buildon offer specialized formulations including:

  • One-Coat Gypsum Plaster: Provides mirror-smooth finishes with over 90% purity
  • Imported Gypsum Plaster and Master Plaster: Designed for premium applications requiring exceptional durability
  • Lightweight Formulations: Including perlite and vermiculite additives for specific performance requirements

Decorative and Craft Applications for Plaster of Paris

Plaster of Paris is typically used in smaller-scale projects, such as sculpting, casting, and crafting. Its rapid setting time and moldability make it ideal for:

  • Decorative ceiling elements
  • Ornamental wall features
  • Artistic installations
  • Repair work on heritage structures

Technical Specifications That Matter to Professionals

Fineness and Purity Standards

Professional-grade gypsum plaster maintains specific technical parameters:

  • Mesh Fineness: Each product is formulated with an appropriate mesh size to ensure smooth application and a premium-quality finish.
  • Purity Levels: Over 90% purity provides optimal atomic bonding and durability
  • Hardness Rating: Premium products offer significantly higher hardness compared to standard market alternatives

Density and Weight Considerations

Gypsum plastering reduces wall weight due to its low density characteristics. This property benefits:

  • Structural Engineers: Reduced dead load calculations
  • Builders: Lower foundation requirements
  • Property Owners: Enhanced earthquake resistance in seismic zones

Cost-Effectiveness and Long-Term Value

Initial Investment vs. Lifecycle Costs

While gypsum plaster may require higher initial investment compared to traditional materials, its benefits include:

  • Reduced Labor Costs: Single-coat application eliminates multiple layer requirements, reducing labor time and associated costs.
  • Material Efficiency: Superior coverage rates mean fewer bags required per project, offsetting higher per-unit costs.
  • Maintenance Reduction: Enhanced durability translates to lower long-term maintenance expenses.

Environmental and Sustainability Considerations

Eco-Friendly Properties

Modern gypsum plaster manufacturing emphasizes environmental responsibility:

  • Natural Mineral Source: Derived from abundant natural gypsum deposits
  • Recyclable Material: Can be reprocessed and reused in future applications
  • Low Carbon Footprint: Manufacturing process requires less energy compared to cement-based alternatives

Indoor Air Quality Benefits

Gypsum plaster contributes to healthier indoor environments through:

  • Moisture Regulation: Natural breathability helps control humidity levels
  • Non-Toxic Composition: No harmful emissions or off-gassing
  • Mold Resistance: Alkaline properties discourage microbial growth

Regional Preferences and Market Trends

Growing Adoption Across India

The construction industry increasingly recognizes gypsum plaster benefits, with significant adoption in:

  • Metropolitan Areas: Delhi, Mumbai, Bangalore, and Pune leading the transition to modern plastering solutions.
  • Emerging Markets: Tier-2 and Tier-3 cities adopting advanced materials for quality construction.
  • Infrastructure Projects: Government and private developers specifying gypsum plaster for large-scale developments.

Professional Recommendations for Material Selection

Project Assessment Criteria

When choosing between gypsum plaster and Plaster of Paris, consider:

  1. Project Scale: Large wall areas benefit from gypsum plaster’s extended working time and superior coverage.
  2. Timeline Requirements: Tight schedules favor gypsum plaster’s efficient application process.
  3. Quality Expectations: Premium finishes require gypsum plaster’s superior bonding and smoothness capabilities.
  4. Budget Allocation: Long-term value analysis often favors gypsum plaster despite higher initial costs.

Quality Assurance Factors

Selecting reliable suppliers ensures project success. Established manufacturers offer:

  • Consistent Product Quality: Standardized manufacturing processes ensure batch-to-batch reliability
  • Technical Support: Professional guidance for application techniques and troubleshooting
  • Warranty Coverage: Product performance guarantees provide project protection

Future Trends in Wall Plastering Materials

Innovation in Gypsum Plaster Technology

The industry continues evolving with developments in:

  1. Smart Formulations: Additives for enhanced performance characteristics including improved workability.
  2. Specialized Applications: Formulations designed for specific environments such as high-humidity areas or exterior applications.
  3. Sustainable Manufacturing: Reduced environmental impact through optimized production processes and renewable energy adoption.

Conclusion

While gypsum plaster and Plaster of Paris share the same mineral origin, their distinct properties make each suitable for different applications. For modern construction and interior wall plastering projects, gypsum plaster stands out as the best wall plaster due to its superior performance, durability, and cost-effectiveness. Its extended working time, enhanced strength, and professional finish quality make it the preferred choice for builders, contractors, and interior designers aiming for exceptional results.

Plaster of Paris retains its value for specialized decorative applications and small-scale projects where rapid setting is advantageous. Understanding these differences ensures optimal material selection for your specific project requirements.

Ready to elevate your next construction or renovation project? Explore Buildon’s comprehensive range of premium gypsum plaster solutions, including one-coat applications, master plaster formulations, and specialized lightweight options. Our products combine the finest raw materials with advanced manufacturing processes to deliver results that exceed industry standards.

Contact our technical team today to discuss your specific project requirements and discover how our premium wall plastering materials can enhance your construction outcomes while providing long-term value and superior performance.

Frequently Asked Questions

Q1: Can gypsum plaster be applied directly on brick walls without a base coat? 

Yes, high-quality gypsum plaster can be applied directly on most surfaces, eliminating the need for sand cement base coats, which saves time and material costs.

Q2: How long does gypsum plaster take to completely cure compared to Plaster of Paris? 

Gypsum plaster typically cures within 24-48 hours for full strength, while Plaster of Paris sets within 30 minutes but achieves full strength in several hours.

Q3: Which material is more cost-effective for large residential projects?

Gypsum plaster proves more cost-effective for large projects due to superior coverage, reduced labor requirements, and lower long-term maintenance costs despite higher initial material costs.

Q4: Is special primer required before painting over gypsum plaster?

Quality gypsum plaster creates an excellent base for painting, though using appropriate primer ensures optimal paint adhesion and coverage, especially for premium finishes.

Q5: What is the shelf life of ready mix gypsum plaster?

Properly stored ready mix gypsum plaster maintains effectiveness for 6-12 months in dry conditions, while opened bags should be used within 30 days for optimal performance.

How to Fix Cracks in Gypsum Plaster?

How to Fix Cracks in Gypsum Plaster?

Builders and homeowners have relied on gypsum plaster for years because it delivers tough walls with smooth finishes that improve interior design. Gypsum plaster shares the common characteristic of all building materials since it develops cracks over time because of multiple contributing factors. While cracks in walls and ceilings diminish their appearance, they also signal potential structural problems that require immediate attention.

This complete guide shows readers how to recognize and evaluate gypsum plaster surface cracks before learning how to fix them properly. The article guides readers through each repair stage by offering instructions step-by-step, along with tool suggestions and expert advice to fix both minor and major plaster cracks while restoring walls to their pristine condition.

Understanding Gypsum Plaster

Gypsum plaster is a versatile building material made from gypsum powder (calcium sulfate dihydrate) mixed with water to form a workable paste. Once applied to walls or ceilings, it sets and hardens through a chemical reaction, creating a smooth, fire-resistant surface that’s ideal for interior finishes.

Composition and Properties

Gypsum plaster typically consists of:

  • Calcined gypsum (plaster of Paris)
  • Water
  • Various additives to control setting time and enhance workability
  • Sometimes sand or other aggregates are used for texture and strength

The material offers several advantages, including:

  • Excellent fire resistance
  • Good sound insulation properties
  • Natural moisture regulation capabilities
  • Smooth finish potential
  • Environmental friendliness due to its natural composition

Common Causes of Cracks in Gypsum Plaster

Understanding why plaster cracks helps homeowners address the root causes rather than just treating symptoms. Several factors can contribute to the development of cracks in gypsum plaster:

Structural Movement

Buildings naturally shift and settle over time, especially during their first few years. This movement can create stress on plaster surfaces, resulting in cracks. Common structural movements include:

  • Foundation settlement
  • Timber frame shrinkage
  • Floor joist deflection
  • Roof truss movement

Temperature and Humidity Fluctuations

Gypsum plaster expands and contracts with changes in temperature and humidity levels. Repeated cycles of expansion and contraction can lead to material fatigue and eventual cracking, particularly:

  • Near heating elements, where rapid temperature changes occur
  • In bathrooms and kitchens with fluctuating humidity
  • Around windows and exterior walls exposed to seasonal changes

Poor Original Installation

Sometimes cracks appear due to issues with the original plaster application:

  • Insufficient plaster thickness
  • Improper mixing ratios
  • Application over unsuitable surfaces
  • Inadequate drying time between coats
  • Poor bonding with the underlying substrate

Impact Damage

Direct physical impacts can cause plaster to crack:

  • Furniture moving against the walls
  • Door handles hitting walls
  • Heavy objects are being mounted without proper support
  • Children playing or having accidents in the home

Age-Related Deterioration

Over the decades, plaster naturally deteriorates as binding materials break down:

  • Chemical changes in the gypsum composition
  • Breakdown of fibrous reinforcement (in older plaster systems)
  • Long-term effects of vibration from nearby roads or appliances

Types of Cracks in Gypsum Plaster

Not all plaster cracks are the same. Identifying the type of crack helps determine the appropriate repair method and whether there might be serious underlying issues to address.

Hairline Cracks

These are the thinnest cracks, typically less than 1mm wide. They often appear:

  • In corners where walls meet ceilings
  • Along the joints between plasterboard sheets
  • In areas with minor seasonal movement
  • As part of normal settling

Hairline cracks usually represent cosmetic rather than structural concerns and are relatively simple to repair.

Stress Cracks

Slightly wider than hairline cracks (1-2mm), stress cracks typically form:

  • In diagonal patterns from the window and door corners
  • Along the ceiling junctions
  • Where different building materials meet

These cracks result from stress concentrations and typically require more thorough repair approaches.

Structural Cracks

These wider cracks (exceeding 2mm) often indicate more serious issues:

  • Accompanied by bulging or sagging
  • Following consistent patterns across multiple rooms
  • Progressively widening over time
  • Sometimes allowing water infiltration

Structural cracks warrant professional assessment before repair, as they may signify foundation problems or other significant structural issues.

Map Cracking

This pattern resembles a road map with interconnected cracks spreading across a surface. Map cracking typically indicates:

  • Shrinkage during the initial drying process
  • Improper plaster mixing
  • Application over surfaces that were too absorbent
  • Rapid drying conditions during installation

Assessing the Severity of Plaster Cracks

Before attempting repairs, it’s important to determine whether cracks are merely cosmetic or symptoms of more serious problems.

When to DIY vs. Call a Professional

DIY-appropriate cracks typically:

  • Are less than 2mm wide
  • Don’t change in width or length over time
  • Aren’t accompanied by other issues like dampness or bulging
  • They are limited to small areas

Professional assessment is recommended when cracks:

  • Exceed 2mm in width
  • Continue to expand over time
  • Form step-like patterns
  • Appear alongside other symptoms like dampness or bulging
  • Recur after previous repairs
  • Affect large sections of walls or ceilings

Simple Assessment Methods

Homeowners can conduct basic assessments by:

  1. Monitoring Progress: Mark the ends of cracks and date them to track changes over weeks or months
  2. Tape Test: Apply paper tape over cracks; if the tape tears, the crack is still active
  3. Moisture Check: Use a moisture meter near cracks to determine if water infiltration is involved
  4. Seasonal Observation: Note whether cracks appear or worsen during specific seasons

Tools and Materials Needed for Plaster Crack Repair

Having the right tools and materials on hand makes plaster repair work much more efficient.

Essential Tools

  • Utility knife or crack widening tool
  • Putty knives in various widths (1″, 3″, and 6″ recommended)
  • Sandpaper (medium and fine grit)
  • Sanding block or pole sander
  • Dust mask and safety goggles
  • Clean mixing containers
  • Drill with mixing attachment (for larger repairs)
  • Spray bottle with water
  • Clean cloths or sponges
  • Painter’s tape

Repair Materials

For minor repairs:

  • Spackling compound or ready-mixed joint compound
  • Self-adhesive fiberglass mesh tape

For more substantial repairs:

  • Setting-type joint compound (also called hot mud)
  • Plaster of Paris
  • Primer-sealer
  • Paint to match existing walls

Optional Specialized Products

  • Plaster bonding agents
  • Acrylic fortifiers for improved adhesion
  • Elastomeric crack fillers for cracks subject to movement
  • Textured spray for matching existing finishes

Step-by-Step Repair Process for Different Crack Types

The repair approach varies depending on the type and severity of cracks. Here are detailed procedures for the most common scenarios:

Repairing Hairline Cracks

  1. Prepare the area:
    • Clean the surface with a damp cloth to remove dust and debris
    • Allow the area to dry completely
  2. Widen the crack slightly:
    • Use a utility knife to carefully scrape along the crack, creating a V-shaped groove
    • This provides better adhesion for the repair compound
    • Remove loose debris with a soft brush
  3. Apply primer-sealer:
    • Brush a thin layer of primer-sealer into the crack
    • This prevents excessive absorption of moisture from the repair compound
    • Allow to dry according to the manufacturer’s instructions
  4. Fill the crack:
    • Apply spackling or joint compound with a 1″ putty knife
    • Press the compound firmly into the crack
    • Feather the edges by drawing the knife at a shallow angle
    • Allow to dry completely (typically 24 hours)
  5. Sand and finish:
    • Lightly sand the repaired area with fine-grit sandpaper
    • Wipe away dust with a damp cloth
    • Apply a second thin coat if necessary
    • Sand again when dry
    • Prime and paint to match the surrounding area

Repairing Stress Cracks

  1. Prepare the crack:
    • Widen the crack to about 1/8″ using a utility knife
    • Clean out debris and dust
    • Mist with water to reduce absorption
  2. Apply mesh tape:
    • Cut self-adhesive fiberglass mesh tape to length
    • Center and apply it over the crack
    • Press firmly to ensure good adhesion
  3. Apply the first compound layer:
    • Mix setting-type joint compound according to instructions
    • Apply over the mesh tape with a 3″ putty knife
    • Feather the edges about 2″ beyond the tape edges
    • Allow to dry completely
  4. Final finishing:
    • Sand the final coat with fine-grit sandpaper
    • Feather edges to blend with the surrounding plaster
    • Wipe clean with a damp cloth
    • Prime and paint the entire wall section for a consistent appearance

Repairing Structural Cracks

Note: Before repairing structural cracks, ensure the underlying cause has been identified and addressed.

  1. Enlarge and clean the crack:
    • Widen to approximately 1/4″ using a utility knife or small chisel
    • Remove all loose material and dust
    • Create a slightly wider space at the back of the crack for better “keying”
  2. Apply bonding agent:
    • Brush a plaster bonding agent into the crack
    • Allow to become tacky (follow manufacturer’s instructions)
  3. First fill with setting compound:
    • Mix a batch of setting-type joint compound
    • For deep cracks, consider adding acrylic fortifier
    • Fill the crack slightly below the surface
    • Allow to set completely
  4. Apply mesh reinforcement:
    • Place fiberglass mesh tape over the initial fill
    • Ensure it extends at least 3″ on either side of the crack
  5. Build up multiple layers:
    • Apply successive layers of compound, each wider than the last
    • The final layer should extend 8-12″ on either side
    • Allow proper drying time between applications
    • Keep the final coat slightly proud of the surface
  6. Final finishing:
    • Sand carefully with medium then fine-grit sandpaper
    • Blend edges with the surrounding plaster
    • Clean dust thoroughly
    • Prime with high-quality primer
    • Paint with two coats for a consistent finish

Repairing Map Cracking

Map cracking often indicates more widespread issues with the original plaster application. In severe cases, replastering might be necessary, but many instances can be repaired:

  1. Surface preparation:
    • Gently scrape any loose material
    • Clean with a damp sponge
    • Allow to dry thoroughly
  2. Apply primer-sealer:
    • Cover the entire affected area with a quality primer-sealer
    • This stabilizes the surface and improves adhesion
    • Allow to dry completely
  3. Skim coat application:
    • Mix a batch of setting-type compound
    • Apply a thin skim coat over the entire affected area
    • Use a wide trowel (8-12″) for smooth application
    • Work in manageable sections
  4. Multiple coat approach:
    • Apply 2-3 thin coats rather than one thick coat
    • Each coat should be approximately 1/16″ thick
    • Allow proper drying between coats
    • Sand lightly between applications
  5. Final finishing:
    • Sand the final coat with fine-grit sandpaper
    • Prime the entire area
    • Apply two coats of quality paint

Pro Tips for Seamless Repairs

Achieving professional-quality results requires attention to detail and some specialized techniques:

Mixing and Working with Compounds

  • Mix only the amount of compound you can use within the setting time
  • For setting-type compounds, clean tools immediately after use
  • Add water sparingly when mixing to avoid a runny consistency
  • For deeper cracks, use setting-type compounds rather than pre-mixed varieties
  • Keep compounds at the right consistency, like smooth peanut butter

Creating Texture Matches

Matching existing textures can be challenging:

  • For smooth finishes, dampen a sponge and lightly drag over nearly-dry compound
  • For light texture, stipple with a brush or sponge while the compound is still workable
  • For moderate texture, consider spray texture products in aerosol cans
  • Test techniques on a scrap board before applying to the walls

Avoiding Future Cracks

Preventive measures can reduce the likelihood of new cracks forming:

  • Allow proper drying time between coats (patience is crucial)
  • Use flexible caulk rather than rigid compounds where different materials meet
  • Consider using elastomeric compounds in areas prone to movement
  • Maintain consistent indoor humidity levels (40-60% is ideal)
  • Address water leaks and moisture issues promptly

Preventive Maintenance to Avoid Future Cracks

Preventing cracks is always easier than repairing them. Regular maintenance helps:

Regular Inspection Routines

Establish a schedule for checking plaster conditions:

  • Look for early signs of cracking after seasonal changes
  • Pay special attention to areas around windows and doors
  • Check ceilings for discoloration or sagging
  • Monitor previously repaired areas for any signs of failure

Climate Control Considerations

Maintaining stable environmental conditions helps preserve plaster:

  • Use humidifiers or dehumidifiers to maintain consistent humidity levels
  • Avoid rapid temperature changes when possible
  • Ensure adequate ventilation, especially in moisture-prone rooms
  • Consider installing climate monitoring systems in historic properties

Structural Maintenance

Address the building elements that support plaster:

  • Repair roof leaks promptly
  • Maintain gutters and downspouts to prevent water infiltration
  • Address foundation issues when identified
  • Ensure proper subfloor ventilation

When to Replace Rather Than Repair

Sometimes replacement is more practical than repair:

Signs That Plaster May Need Replacement

Consider replacement when:

  • Plaster sounds hollow when tapped (indicating detachment)
  • Large sections are bulging or sagging
  • Water damage has caused extensive deterioration
  • Previous repairs continue to fail
  • The cost of repair approaches the replacement cost

Partial vs. Complete Replacement Options

When replacement is necessary:

  • Consider spot replacement for localized damage
  • Evaluate plasterboard overlay systems that preserve the original plaster
  • For complete replacement, consider modern veneer plaster systems
  • In historic properties, weigh authentic restoration against practical considerations

Why Choose Buildon?

When it comes to repairing cracks in gypsum plaster, especially for significant or recurring issues, professional expertise can make all the difference between a temporary fix and a lasting solution. BuildOn has established itself as one of India’s premier building restoration and repair services, with a particular specialization in traditional plastering techniques.

Comprehensive Assessment Approach

BuildOn stands apart through its methodical assessment protocol. Before recommending any repair solution, their technicians conduct:

  • Detailed visual inspections using specialized lighting to reveal subtle crack patterns
  • Moisture mapping to identify hidden water infiltration
  • Structural movement analysis to determine if cracks indicate more serious issues
  • Material compatibility testing to ensure repair compounds will bond properly with the existing plaster

This thorough approach prevents the common industry problem of “repair cycling”—where inadequately diagnosed cracks are repeatedly fixed only to reappear months later.

Customized Solutions for Every Property

Unlike companies offering one-size-fits-all repair methods, BuildOn develops tailored solutions for each project. Their repair strategies account for:

  • The age and historical significance of the building
  • The specific composition of the existing plaster
  • Local climate and environmental factors
  • The property’s usage patterns and requirements
  • Budget constraints without compromising quality

This customized approach ensures optimal results whether working on a simple hairline crack in a modern apartment or an extensive restoration in a heritage structure.

Conclusion

Successful gypsum plaster crack repair demands knowledge of the crack type and causes, alongside choosing the correct repair methods. There are repairs that DIY enthusiasts can handle, but structural problems need professional work.

Homeowners who adhere to this complete guide will attain professional-grade repairs that create lasting, appealing results. A successful plaster repair requires not only filling cracks but also understanding and correcting underlying causes while selecting suitable materials and employing correct techniques.

When dealing with complex repairs or properties of historical importance, it’s essential to seek guidance from skilled experts such as Buildon to maintain both structural soundness and aesthetic appeal of plaster surfaces.

Gypsum plaster walls and ceilings will remain attractive and resilient over time if they receive proper maintenance and prompt repairs.

1 2 3 6